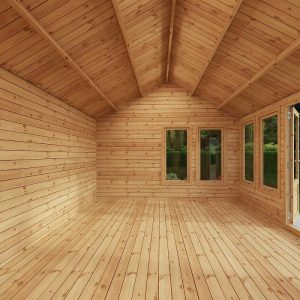
 Don’t just think of a log cabin as a summer building. There’s no reason why it can’t be used throughout the year.
It just takes a little thought about insulation.
A good starting point is to consider the thickness of the logs which act as good thermal insulators.
The thicker the log the more heat efficient it will be – no surprise there then!
So bear in mind that a 70mm log cabin will retain heat better than a 44mm log cabin due to its increased wood density.
And double glazed windows and doors will also help to keep the cabin warm.
But, even with thicker logs and double glazing, up to 70% of heat will be lost through the roof and the floor.
So the real difference comes from fitting floor insulation directly under the floor boards and between the floor joists and roof insulation above the roof boards.
Floor and roof insulation kits are available and are very often an optional extra when buying a cabin – all our Lasita Maja log cabins come with this option.
Insulating the Floor
- Log cabin flooring is made up of packs of tongue and groove boarding nailed to pressure treated bearers.
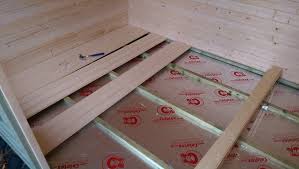
- Directly beneath the flooring, and between the joists, fit foil-backed insulation boards, for example 25mm or 50mm Celotex, a compressed foam material between silver foil. They can be easily cut-to-size with a Stanley knife or similar blade.
- The boards should be off the ground to prevent prevent moisture rising up from the floor into your cabin. This can be done by fixing the screws 30mm below the top of the floor joist and about 600mm apart. This enables the screws to act as supports that the insulation board can be pushed down on to. The board is then suspended inbetween the floor joists and on top of the screws.
- Make sure the Celotex fits snugly between the bearers to avoid cold spots.
- Once you have filled in between all the floor joists with the insulation boards, tape all the joints and seams using foil tape.
- You can now lay the cabin floor boards.
Insulating the Roof
The method below uses a ‘warm’ roof system whereby the insulation is fitted on top of the cabin roof and not underneath. This is a neater and more effective system and is quick to install. It also has the advantage of leaving the timber roof and joists as features inside the cabin with no loss of headroom.
- Fit your tongue and groove roof boards but do not felt or fit shingle tiles yet.
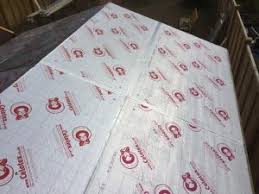
- Fit a vapour barrier (special silver quilted membrane) on to the upper side of the boarding to create a ‘warm’ roof with a minimum of 100mm of overlap.
- Secure a frame of, eg 1.5″ x 1.5″, battens around the perimeter of the roof including up to the gable ends to the ridge point, fitted on top of the membrane.
- Within the frame, fit the insulation boards on top of the membrane flush up against the internal edges of the perimeter battens with the foil side up. The insulation boards can be easily cut-to-size with a Stanley knife or similar blade.
- Once the roof is fully fitted with the insulation board, tape up all the joints and seams with foil tape which seals the roof fully.
- Fit the solid sheet roof boarding (OSB) over the top of the insulation and secure right through into the roof joists.
- You should lay full size OSB sheets where you can and then fill in the spaces left with smaller cut to size boards (marine ply of at least 9mm thickness would be ideal – this is more expensive than OSB but longer lasting)
- Once the roof is fully finished and boarded over, fix the chosen roofing – shingle tiles, roofing felt or EPDM rubber roofing.
So, to sum things up, with 50mm floor insulation and 50mm roof insulation together with minimum 44mm log thickness and double glazing, your log cabin will now be suitable for use all year round. Job done.
And for some added warmth and cosiness, why not think about
Carpeting
- Add some underlay and carpet to your log cabin floor for a simple way to add some warmth.
Curtains
- Hang some curtains at the windows for that cosy feeling and to keep any draughts at bay.
Running an Electricity Supply to your Cabin
- Essential if you are wanting heating and lighting – and, most importantly, a kettle! Plan what you want to power in your cabin and consult an approved electrician. Having electricity will make your cabin really feel like a home from home.


